


5 Common Insulation Installation Mistakes That Cost You Money
Expert guidance for homeowners

Skipping the Energy Assessment Before Installation
Many homeowners rush into insulation projects without understanding where their energy loss actually occurs. Installing insulation without a proper energy assessment is like treating symptoms without diagnosing the disease. You might add layers of fiberglass to your attic, while your real problem is air leakage around windows or gaps in exterior walls.
This common oversight leads to spending money on materials that deliver minimal return on investment. During Illinois winters, when temperatures in Mattoon regularly drop below freezing, these inefficiencies become painfully obvious through skyrocketing heating bills.
A thorough assessment identifies thermal bridging, air infiltration points, and moisture problems that insulation alone cannot solve. Without this foundational step, you risk investing hundreds or thousands of dollars in materials that fail to address your home’s actual vulnerabilities.
Professional energy audits use thermal imaging and blower door tests to reveal exactly where conditioned air escapes, allowing you to prioritize improvements that deliver measurable savings. Skipping this critical first step often results in partial solutions that leave homeowners frustrated and still facing high utility costs month after month.
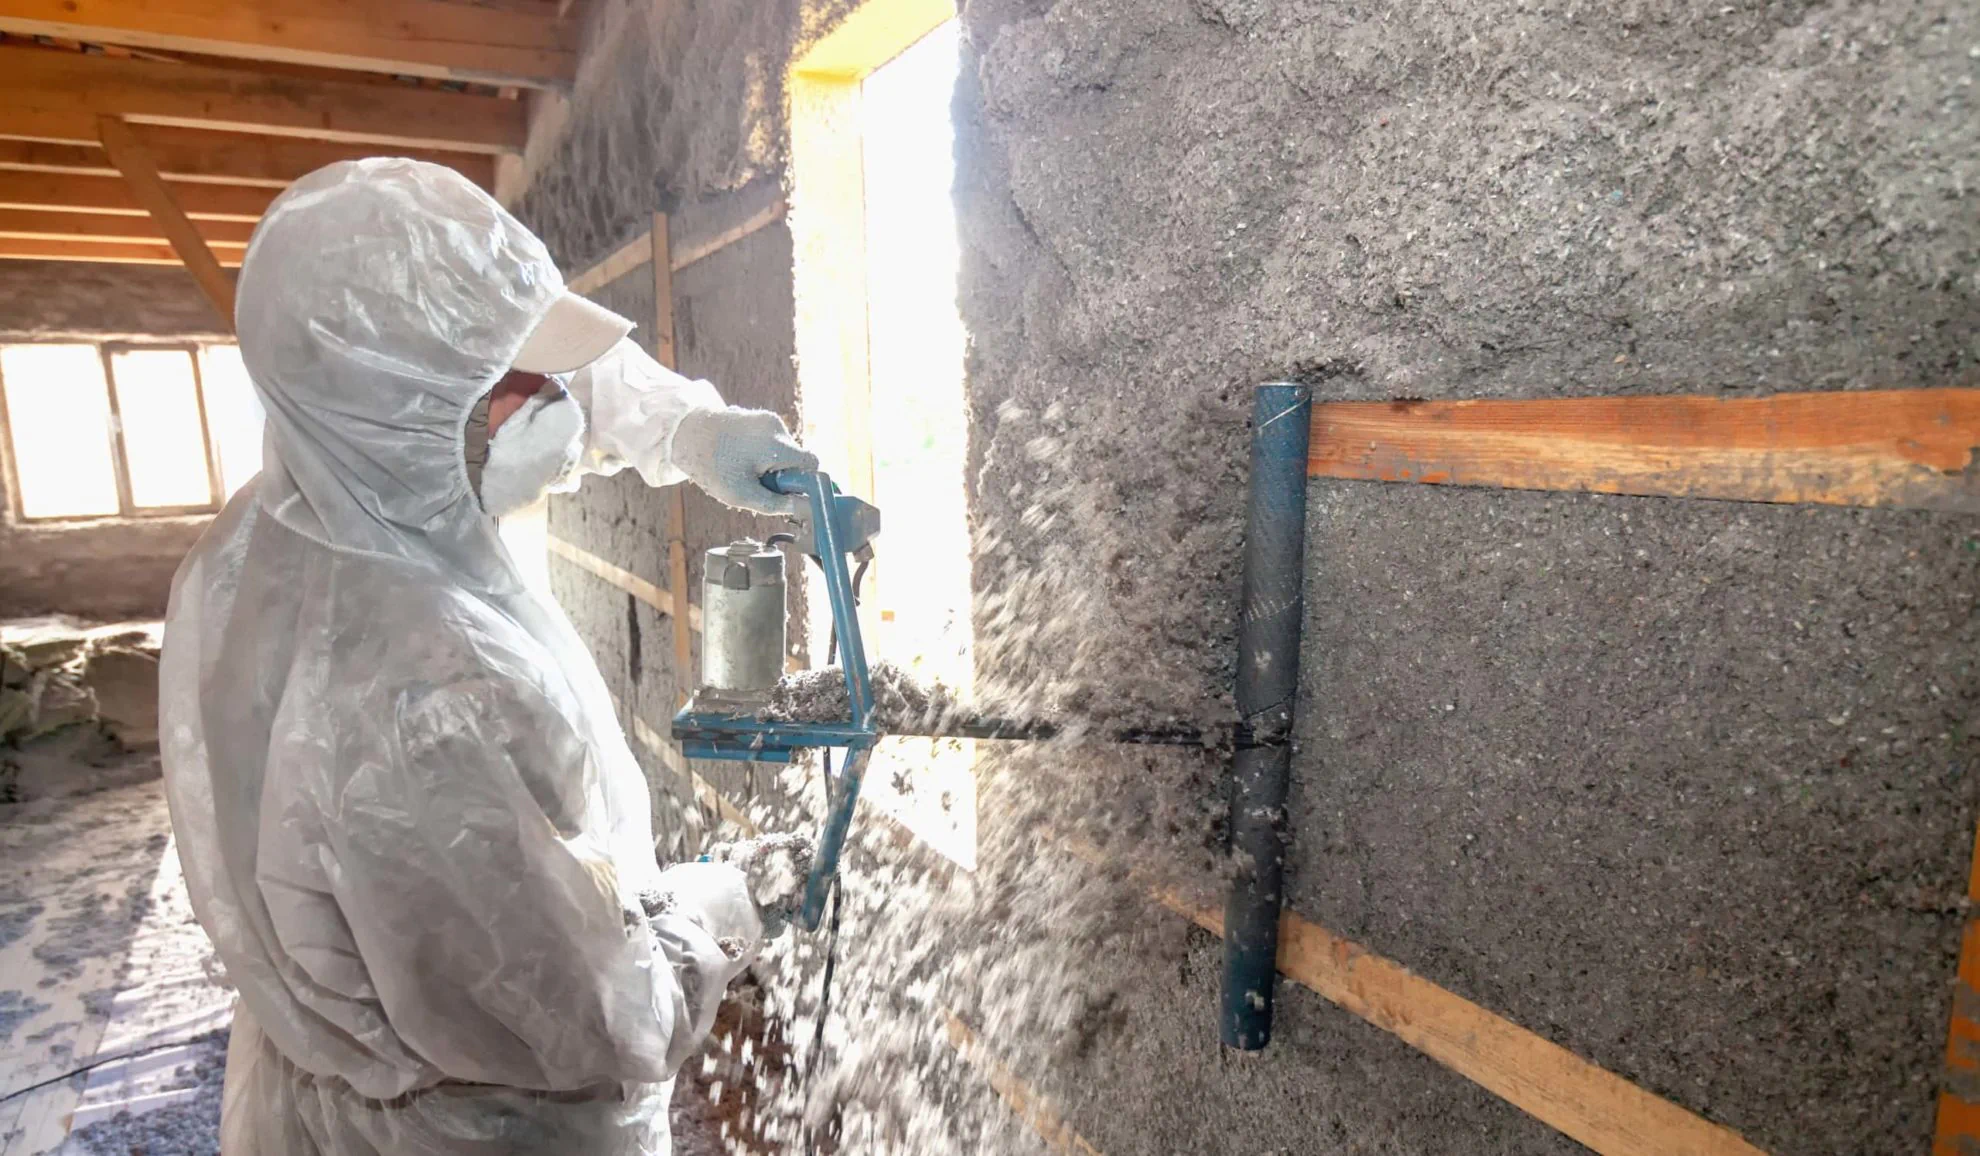
Compressing Materials and Reducing R-Value
Insulation works by trapping air within its structure, and compressing these materials destroys their thermal performance. When fiberglass batts are stuffed into spaces that are too small or crushed by storage boxes in an attic, their R-value plummets.
The R-value measures thermal resistance, and it depends entirely on maintaining the proper thickness and loft of the material. Cramming insulation around pipes, wiring, or into tight cavities can reduce effectiveness by 50 percent or more, essentially wasting half your investment.
This mistake is particularly costly because it is invisible once walls are closed or attic access is limited. Many DIY installers do not realize that squeezing an R-30 batt into a space designed for R-19 does not give you better insulation; it gives you expensive, underperforming filler.
In climates like central Illinois, where seasonal temperature swings are significant, maintaining full loft is essential for year-round comfort. Compressed cellulose insulation similarly loses its air-trapping capacity, allowing heat transfer that negates the purpose of installation. Proper installation requires cutting materials to fit without forcing them, ensuring every fiber maintains its designed structure.
When insulation cannot fit properly, the solution is not compression but selecting appropriate materials or adjusting framing to accommodate full-thickness application.
Ignoring Air Sealing Before Adding Layers
Adding insulation without first sealing air leaks is one of the most expensive mistakes homeowners make. Insulation slows heat transfer through conduction, but it does nothing to stop air movement through gaps, cracks, and penetrations.
Air leakage accounts for 25 to 40 percent of heating and cooling costs in typical homes, far exceeding losses from inadequate insulation alone. Installing new batts or spray foam over unsealed gaps is like pouring water into a bucket full of holes.
Common leak points include recessed lighting fixtures, plumbing penetrations, electrical outlets, attic hatches, and the junction between walls and foundations. In older Mattoon homes, these gaps can be extensive, allowing conditioned air to escape continuously regardless of how much insulation you pile on top.
The proper sequence always starts with air sealing using caulk, spray foam, or weatherstripping, followed by insulation installation. When air moves freely through your building envelope, it carries heat with it through convection, bypassing insulation entirely.
This is why homes with thick attic insulation can still feel drafty and uncomfortable. Professional installers understand that air barriers and thermal barriers serve different functions and both must be addressed. Skipping air sealing not only wastes your insulation investment but can also create moisture problems as humid indoor air migrates into wall and ceiling cavities where it condenses and causes mold or structural damage.
Blocking Ventilation in Attics and Crawl Spaces
Proper ventilation is essential for managing moisture and preventing premature deterioration of roofing materials, yet many insulation installations block critical airflow paths. When insulation is pushed against roof decking or covers soffit vents, it traps moisture that would normally escape, creating ideal conditions for mold growth and wood rot.
Attics need continuous airflow from soffit vents at the eaves to ridge or gable vents at the peak, maintaining a temperature and moisture balance that protects structural components. Blocking this pathway with insulation can reduce roof lifespan by years and create hidden moisture damage that costs thousands to remediate.
In humid Illinois summers, when warm air holds significant moisture, blocked ventilation becomes particularly problematic as condensation forms on cool surfaces within the attic. Baffles or rafter vents should be installed between every rafter bay to maintain the ventilation channel while allowing insulation to reach full depth.
Similarly, crawl space insulation must not block foundation vents or create dead air pockets where moisture accumulates. The combination of trapped moisture and organic materials like wood or cellulose creates perfect conditions for microbial growth that degrades indoor air quality throughout the home.
Professional installers understand building science principles that balance insulation depth with ventilation requirements, ensuring your investment delivers long-term performance without hidden consequences. Fixing ventilation problems after insulation is installed often requires expensive removal and reinstallation, multiplying the cost of this preventable mistake.
Choosing the Wrong Materials for Your Application
Not all insulation materials perform equally in every application, and selecting the wrong type for your specific needs wastes money on suboptimal results. Fiberglass batts are economical for standard stud cavities but perform poorly in irregular spaces or around obstructions.
Cellulose offers excellent coverage in attics but should not be used in damp locations where it absorbs moisture. Spray foam provides superior air sealing but costs significantly more per square foot, making it impractical for large open attic floors where blown-in materials perform adequately.
Each material has specific strengths, limitations, and ideal applications that must be matched to your home’s construction and climate challenges. Using fiberglass in a damp crawl space invites moisture problems, while choosing open-cell spray foam in exterior walls of older homes without adequate vapor barriers can trap moisture and cause structural damage. In the
Mattoon area, where both humid summers and cold winters create diverse thermal challenges, material selection must account for seasonal moisture dynamics and temperature extremes. Rigid foam boards excel for exterior wall applications but require proper installation to avoid thermal bridging at seams.
Reflective barriers work well in radiant heat applications but provide minimal insulation value in conductive heat transfer situations. Co Lab Insulation brings decades of experience matching materials to applications, ensuring every project uses the right solution for maximum performance and longevity.
Their professionals understand the thermal and moisture characteristics of spray foam, cellulose, and fiberglass options, recommending appropriate materials based on your home’s specific conditions rather than pushing a one-size-fits-all solution. Trusting experienced installers means avoiding costly material mismatches that compromise comfort and waste your investment.
